Rolos Platform: User Guide
Adding workflows to your project
A project workflow is depicted by a graph that consists of ordered nodes. Each node represents a step in the workflow. Each node must contain at least one executable file and one virtual environment in which to run this file.
To add a workflow to your project:
- In My projects, click the name of a project you need.
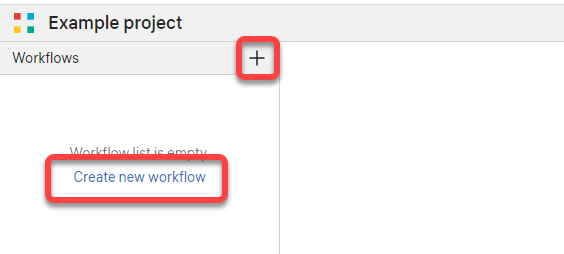
- In the project you selected, switch to the Workflow tab.
- Click the plus icon
(or Create new workflow).

- Specify the workflow name and click Create workflow. The workflow workspace will open.
- Click Add node.
- Select what type of node you want to use for the current step:
- Common node — a node is executed on the Rolos Platform hardware.
- HPC cluster node — a node is executed on the HPC cluster provider hardware.

|
To enable adding HPC clusters, resources must be added to the project beforehand. See Adding resources to your project. |
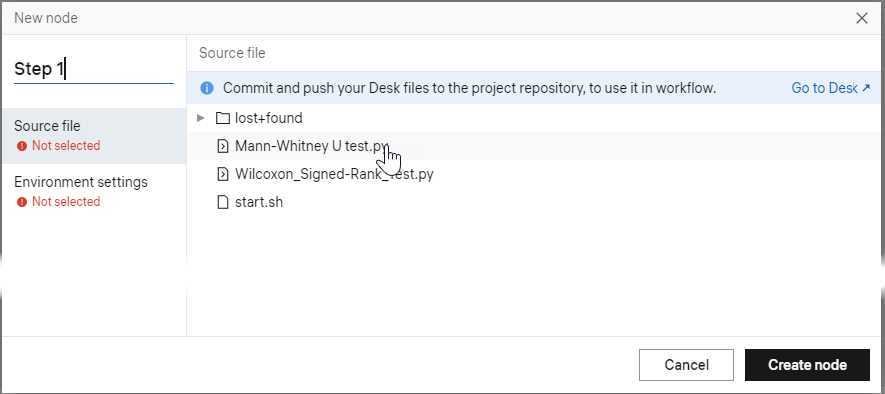
- Specify the node name. Click a file name to select the executable file for the workflow step represented by this node.

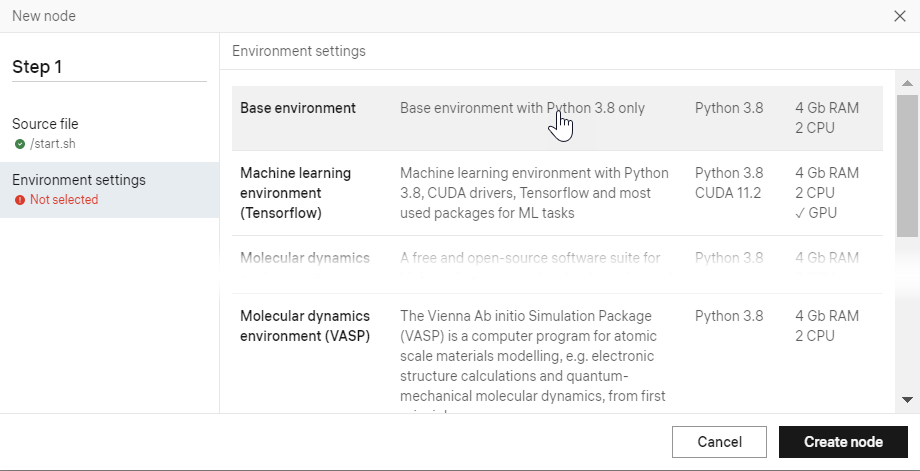
- Click the virtual environment name to select the environment in which to run the file.

- Configure the virtual environment resources and click Create node.
- Repeat steps 5–9 to add each node that the workflow should include.
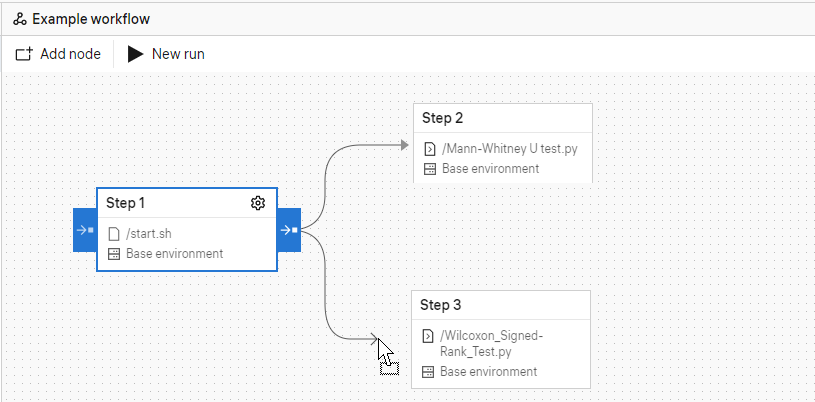
- Drag and drop nodes to configure the workflow as you need. Connect the nodes in the order the steps must be executed. You can use serial or parallel connections.

After you have configured the workflow, you can run it.
Prev Next